The MacValley blog
![]()
Welcome to the MacValley blog, your first stop for all the latest MacValley news and views.
|
The MacValley blog Editor: Tom Briant
|
Labels used in posts
|
To search the blog posts please use the box below
Saturday, January 19, 2019
How to Read and Write to a USB floppy drive through MacOS
I have found a way to access floppy drives in MacOS.
This technique uses readily available software and hardware.
It doesn’t involve the Terminal.
It doesn’t involve undocumented commands within MacOS that may go away with the next update.
I have tried this technique on both macOS 10.13.6 on a 2011 Mac mini and 10.14.2 on a 2014 MacBook Air.
Let’s proceed!
How He do it?
Parallels Desktop 14 and Ubuntu Linux 18.04 lie at the heart of this technique.
Ubuntu Linux 18.04 can access a floppy drive, unlike macOS and Windows 10.
Parallels Desktop 14.1 includes a simple way to install Ubuntu as a guest OS under macOS and can access both the host operating system’s User folder and the USB floppy drive.
Step #1:
Go to the Parallels website here to download a trial version. You can try it for 14 days before committing to buying it.
It comes as an installer. Double-click on it and follow the on-screen instructions.
Step #2:
Within Parallels Desktop, go to the File… menu and select New.

Step #3:
You will see a Create New screen offering several options.
You want the Download Ubuntu Linux, next to the orange dot with the white lines.

Step #4:
Click on the orange Ubuntu Linux circle to select it. You will see a light-blue square with rounded corners overlay it.
Now click on the blue Continue button at the lower right-hand corner.

Step #5:
You will see a screen briefly describing Ubuntu Linux and the company producing it, Canonical Ltd.
Click on the blue Download button in the lower right-hand corner

Step #6:
The download will start. How long it takes depends on the speed of your Internet connection. Wired connections will run faster than Wi-Fi.
This screenshot was taken with a computer on a wired Internet connection.

Step #7:
After the download of the compressed archive file finishes, it will take a moment to unarchive the file.

Step #8:
You enter your new password. You will type it again in the next step to confirm it’s the right password

Step #9:
Retype the password to confirm it’s the correct one.

Step #10:
Click on the Orange Parallels box. Parallels is your user name, assigned to you by Parallels Desktop’s auto installer.

Step #11:
Type in your password
Step #12: Success!
You’ve arrived at the Ubuntu Linux Desktop

Step #13: Attach the floppy drive.
If you haven’t plugged the floppy drive into a USB port, do so now.
To connect the floppy drive to the Ubuntu Linux, you need to go up to the Devices Menu. This is part of Parallels Desktop itself.
Step #14: The Devices Menu
Now you see the Devices menu with its drop-down file item for USB & Bluetooth.
Click on the USB & Bluetooth item. You get the physically attached USB Floppy Drive.
Click on the item for the USB Floppy Drive to connect it to the Ubuntu Linux.

Step #15: The Floppy Disk Icon Appear on the Ubuntu Desktop
The Floppy Disk icon with the name of the floppy (in this case, it’s DATA0704) appears on screen.
You have to put in a real floppy to make the floppy drive work. You’ll get an error message if you don’t.
In case of error message, just stick in a floppy disk.
![]()
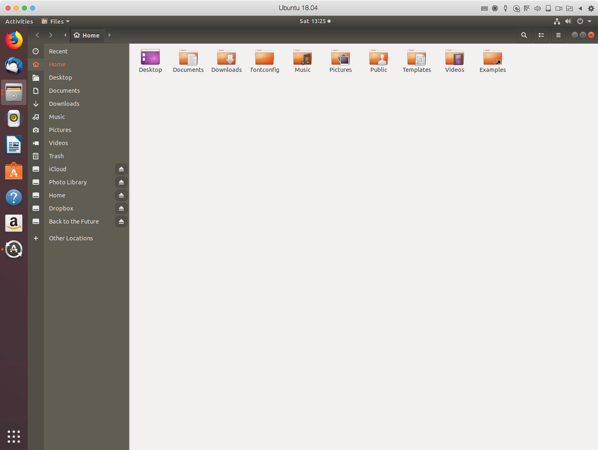
Step #16: Open the Home Folder.
A bit of explanation. For the MacOS, the User folder is where the user’s documents are stored.
In Linux, the Home folder is where the user’s documents are stored.
So here, If you click on the Parallels Shared Folders to see a folder named Home, it’s the MacOS Users folder.

Step #17: Apologies for Confusion.
Ideally, you should babysit this process from start to finish in case you need to intervene. It should take about an hour.
I tried this twice today on the same Mac mini. One time, no problems. The second time, I needed to shut down the whole Parallels Desktop software. After I restarted it a few minutes later, everything worked fine.
You should undertake this with a patient attitude. The installation of the Shared Folders can get a little hairy at times. You may see a box asking for your password. If so, you should enter it.
My conclusion after working with this is that this is the simplest method of gaining access to a floppy drive through a Macintosh running 10.13 or 10.14 without involving a second physical computer.
This Parallels Desktop software is worth the $79.99. I tried using the free VirtualBox 6.0 software from Oracle. I spent four unsuccessful hours trying to replicate what I did in less than an hour with Parallels. Spend the money! You’ll get what you paid for in this case. Your time is worth at least $20/hour. Remember that!
The command you’ll use most often is the “Control + Alt/Option” combo to free your cursor from Ubuntu Linux. Remember it, Control + Alt/Option.
Good Luck, be patient, and rejoice when this works.
Thomas Briant
Editor, MacValley Blog
thomasbriant@me.com
Tuesday, January 1, 2019
Start With Growly Journal for your new 2019 Journal
Did you vow to start a journal in 2019?
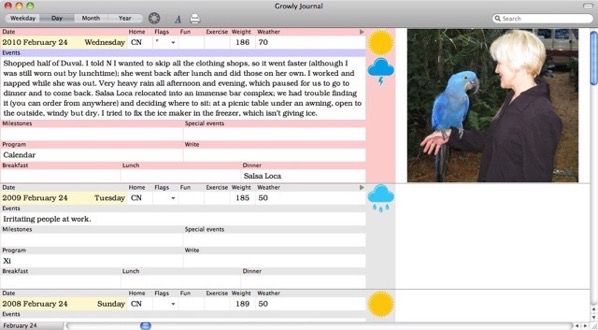
If you have the determination, but need an app to start with…may I suggest Growly Journal from Growly Bird Software?
Advantages:
1. It’s free
2. It gives you categories for entering data in case of brain freeze.
3. It exports to a per-entry plain text format.

Sure, you can get fancier apps and pay up to $40 for them. Why not start with Growly Journal?
Tom Briant
Editor, MacValley Blog


